

A simple file upload can feel broken without proper visual feedback. Users click upload, then nothing happens for several seconds, creating “silence” and doubt, especially for large files or slow connections. This is where React file upload progress tracking comes in.
Progress feedback fixes that gap by showing users that the upload is working, how fast it moves, and when it will finish. This matters even more when handling large images, PDFs, or videos.
Without proper progress tracking, users might retry uploads, refresh pages, or abandon the flow completely. Conversely, with it, they stay confident and in control. But how do you really start with it?
The native <input type=”file”> element only lets users select files and not show progress. You must implement progress tracking yourself. In this article, you’ll explore different ways to do this in React and learn about some considerations for DIY implementations.
Understanding the Progress Event
To build React file upload progress tracking, you need access to low-level browser events. These are the more granular interactions between users and the browser, such as mouseup and mousedown (as opposed to click). The key concept is the ProgressEvent, which browsers emit during uploads.
A ProgressEvent gives you three important values:
- loaded: bytes uploaded so far
- total: total bytes to upload
- lengthComputable: whether the system can calculate progress
From these, you can compute the percentage of progress:
| const percent = Math.round((event.loaded / event.total) * 100); |
This event doesn’t come from React but from the browser’s networking layer. Instead, React simply listens and updates the UI state.
Why XMLHttpRequest Still Matters
Modern apps often use fetch, but React fetch upload progress is still limited. The Fetch API does not reliably expose upload progress in all browsers, making it unsuitable for consistent tracking. XMLHttpRequest solves this by exposing xhr.upload.onprogress, which fires continuously during uploads.
Tip: Even if you use libraries like axios, they rely on this same underlying event.
Part 1: Building the React Component with XMLHttpRequest
Let’s build a working React file upload component example that supports real progress tracking.
Step 1: Define Component State
In this step, we need to track the following:
- Selected file
- Progress percentage
- Upload status
In your component (in this case, FileUploader.js), insert the following snippet:
| import React, { useState, useRef } from ‘react’; function FileUploader() { const [file, setFile] = useState(null); const [progress, setProgress] = useState(0); const [status, setStatus] = useState(‘idle’); const xhrRef = useRef(null); const handleFileChange = (e) => { setFile(e.target.files[0]); setProgress(0); setStatus(‘idle’); }; |
This code sets up everything the component needs to track during upload.
- file stores the selected file from the input
- progress keeps the current upload percentage
- status shows what’s happening (idle, uploading, success, error)
- xhrRef keeps a reference to the active request so that we can cancel it later
When a user selects a file, handleFileChange resets everything so a new upload starts cleanly.
Step 2: Create the Upload Function
Here is where React upload progress event handling happens. The handleUpload function manages the actual upload process:
- A new XMLHttpRequest is created to send the file
- FormData wraps the file so it can be sent like a normal form
- xhr.upload.onprogress listens for upload updates and calculates the percentage
- setProgress updates the UI in real time
- onload checks if the upload succeeded
- onerror handles network failures
| const handleUpload = () => { if (!file) return; const xhr = new XMLHttpRequest(); xhrRef.current = xhr; const formData = new FormData(); formData.append(‘file’, file); xhr.open(‘POST’, ‘http://localhost:5000/upload’); xhr.upload.onprogress = (event) => { if (event.lengthComputable) { const percent = Math.round((event.loaded / event.total) * 100); setProgress(percent); setStatus(‘uploading’); } }; xhr.onload = () => { if (xhr.status === 200) { setStatus(‘success’); } else { setStatus(‘error’); } }; xhr.onerror = () => { setStatus(‘error’); }; xhr.send(formData); }; |
Step 3: Add Cancel Support
This function lets users stop an upload in progress. It works so that:
- xhr.abort() immediately stops the request
- The UI resets back to idle
- Progress is cleared
| const handleCancel = () => { if (xhrRef.current) { xhrRef.current.abort(); setStatus(‘idle’); setProgress(0); } }; |
This improves UX, especially for large files or slow networks.
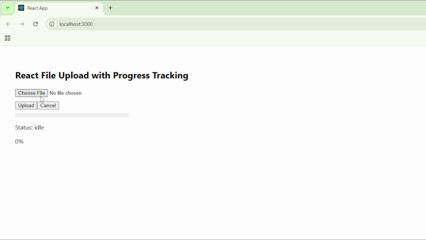
Step 4: Render Basic UI
This part connects everything to the screen.
- The file input lets users choose a file.
- The buttons trigger upload and cancel actions.
- The progress bar reflects the current upload percentage.
- Status text shows what’s happening.
| return ( <div> <input type=”file” onChange={handleFileChange} /> <div style={{ marginTop: ’10px’ }}> <button onClick={handleUpload}>Upload</button> <button onClick={handleCancel}>Cancel</button> </div> <div style={{ marginTop: ’10px’, width: ‘300px’, background: ‘#eee’ }}> <div style={{ width: `${progress}%`, height: ’10px’, background: ‘blue’ }} /> </div> <p>Status: {status}</p> <p>{progress}%</p> </div> ); |
Run the application, and you’ll see the application in action. Note that this simulation disables throttling in the network tab of the browser’s dev tools.
At this stage, the app is fully functional. However, it might still feel a little lacking in terms of usability. Let’s fix that real quick.
Part 2: Adding UI (Progress Bar, Cancel Button)
At this point, the upload works. Now we improve how it feels for users. In this section, we’ll address the following concerns that users might have:
- Is the upload slow or stuck?
- Did something fail?
- Should I retry?
Better UI helps answer all these questions.
Step 1: Improve the Progress Bar
Replace your current bar with a clearer version:
| <div style={{ marginTop: ’10px’, width: ‘300px’ }}> <div style={{ background: ‘#eee’, height: ’10px’, borderRadius: ‘5px’ }}> <div style={{ width: `${progress}%`, height: ‘100%’, background: progress === 100 ? ‘green’ : ‘blue’, borderRadius: ‘5px’, transition: ‘width 0.3s ease’ }} /> </div> </div> |
This helps produce smoother animation and clearer feedback while also indicating visual completion (turns green at 100%).
Step 2: Add Conditional Status Messages
Replace your status text with:
| {status === ‘idle’ && <p>Select a file to upload</p>} {status === ‘uploading’ && <p>Uploading… {progress}%</p>} {status === ‘success’ && <p>Upload complete!</p>} {status === ‘error’ && <p>Upload failed. Try again.</p>} |
This lets users know what to do next and whether there are errors or not. Additionally, it makes the progress bar feel more active and not just static.
Step 3: Disable Buttons When Needed
Next, replace your original upload and cancel buttons with:
| <button onClick={handleUpload} disabled={!file || status === ‘uploading’}> Upload </button> <button onClick={handleCancel} disabled={status !== ‘uploading’}> Cancel </button> |
This disables buttons as needed, preventing duplicate uploads and avoiding accidental clicks.
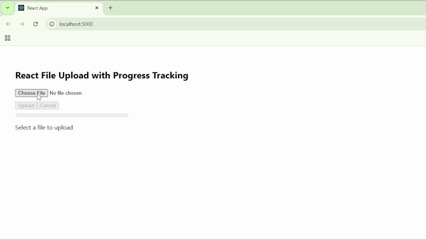
Step 4: Show the File Name
Lastly, let’s show the name of the file.
| {file && <p>File: {file.name}</p>} |
This confirms that the user selected the correct file, helping avoid user confusion or upload anxiety.
Now, running the improved application should get you something like the GIF below. This upload simulation uses the “Fast 4G” preset of the browser network settings.
Handling network failures, chunking, and cross-browser issues at the same time? Explore the React Filestack documentation to see a simple API-based implementation.
Some Considerations for DIY Progress Tracking
The implementation works because the browser exposes xhr.upload.onprogress. That gives you visibility into the uploaded bytes; however, this only covers a single uninterrupted request. The moment real-world conditions change, the model could break.
Resumable Uploads
Consider a user uploading a 200MB video on unstable Wi-Fi. If the connection drops at 95%, the current setup has no memory of progress. The upload then restarts from zero since the server treats it as a new request.
This happens because the browser sends the file as one continuous stream; there is no checkpoint system.
To fix this, you need chunked uploads. This means splitting the file into smaller parts, sending each part separately, and tracking which chunks succeeded. You then reassemble the file on the server.
This sounds manageable until you account for retries, ordering, and consistency. You now need to track chunk indexes, handle partial failures, and prevent duplicate chunks.
Error Handling Complexity
The normal progress tracking setup only treats failure as a simple success/error outcome based on xhr.status. In production, though, failures are rarely binary, and a request can succeed but return corrupted data. Moreover, a timeout may occur after the server has already processed part of the file. To handle this properly, you need:
- Timeout awareness (client retries vs. server completion)
- Idempotency (safe retries without duplication)
- Validation after upload (file integrity checks like hashes)
Without these, retries can create duplicate files, incomplete uploads, or inconsistent records in your database. This is typically where most implementations start breaking under real traffic.
Browser Inconsistencies
Even though XMLHttpRequest has wide support, behavior still varies across environments. For example, mobile browsers may throttle background uploads. Some browsers also delay or batch progress events, which makes your progress bar jump instead of update smoothly.
Furthermore, large files expose memory limits differently depending on the device. On lower-end devices, uploads can silently fail or freeze the UI if there’s too much data buffering. To work around this, production systems
- Throttle concurrency (limit simultaneous uploads)
- Avoid loading entire files into memory
- Normalize progress behavior in the UI
State Management Overhead
Tracking one file is straightforward, but the moment users upload multiple files, your state model needs to change. Each file now has its own progress, status, retry logic, and cancellation.
In these scenarios, a single useState value may no longer work. You need a structured state (array or map) keyed by file ID, plus logic to update each upload independently. Avoiding designing this early on can lead to UI bugs appearing quickly, wrong progress bars updating, and canceled uploads continuing.
Security and Validation
File uploads are one of the most common entry points for untrusted input. The browser sends whatever the user selects, including files that may be disguised or intentionally crafted to exploit your system.
Relying on file extensions or MIME types from the client is insufficient. This is because attackers can rename executable files to appear as images. Proper validation requires checking file signatures (magic bytes) on the server and rejecting anything that does not match expected formats.
Beyond type validation, size limits are necessary to help prevent resource exhaustion or DDoS. Large uploads can consume memory, CPU, and storage, especially during processing steps like resizing or transformation.

Storage also needs isolation. Uploaded files should not immediately appear accessible from public paths until the system validates and sanitizes them. Without this, an attacker could upload a malicious file and access it directly. To help protect your infrastructure from different kinds of attack.
The Better Way: Implementing with Filestack
The manual approach teaches you how upload progress works. It also exposes where the complexity actually resides, which includes handling unreliable networks, large files, and unpredictable user behavior.
A managed solution like Filestack changes the model by moving those concerns into a dedicated service.
Instead of sending one large request, Filestack automatically breaks files into chunks, and each chunk uploads independently and reports progress. If the network drops, only the failed chunks retry, resuming the upload instead of restarting. This addresses the problem you saw earlier with large files.
Progress tracking also becomes more meaningful with managed solutions. In traditional setups, progress reflects a single request. With chunked uploads, progress reflects the aggregate state of multiple chunks. This produces smoother and more accurate feedback, especially for large files.
Another improvement is consistency across browsers. Traditional React implementations rely on XMLHttpRequest, which behaves slightly differently depending on environment and file size. Filestack standardizes this behavior, so your app does not need browser-specific workarounds.
Filestack also handles security at multiple layers, and files pass through validation, scanning, and controlled storage before becoming accessible. This removes the need to build your own validation pipeline while still allowing customization where needed.
From a React perspective, integration becomes simpler. Instead of managing raw network requests, you work with a higher-level API that emits upload states. You still get progress updates, but without wiring low-level events yourself.
This shifts your role from “implementing uploads” to “configuring upload behavior.” You decide limits, UI behavior, and integrations, while the service handles transport, retries, and scaling.
For production applications, this matters because uploads tend to get more complex as time progresses. Requirements keep expanding to include better reliability, compliance, and performance. A managed approach reduces the surface area you need to maintain.
Conclusion and Recommendation
You now understand how to implement React file upload progress tracking, building a working solution using XMLHttpRequest and connecting it to a React state.
That approach teaches the fundamentals, showing how browsers emit progress events and how UI reflects them. In turn, this knowledge helps you debug and extend most upload systems.
However, production requirements can quickly grow beyond the basics of progress tracking. For example, large file handling, retry logic, and security introduce real complexity. At that point, the decision shifts from implementation to strategy, and you must decide where your team should spend its effort.
If your project requires complete control over file upload handling, and if you have the time and resources, building custom solutions may make sense. If not, using a managed solution can significantly reduce long-term cost and risk.
What you need to do then is to evaluate your use case. Identify expected file sizes, traffic, and reliability requirements. Afterwards, choose an approach that aligns best with your needs.
Skip the complexity. Add robust file uploads with built-in progress tracking, resumable uploads, and a pre-built UI in minutes.